




Installing Carbide Snow Plow Blades: Torque, Bolt Patterns, and Mistakes to Avoid
Most carbide blade failures do not start on the road; they start in the shop. A blade installed with mismatched holes, uneven clamping, or wrong torque will wear unevenly, loosen under load, and fail…
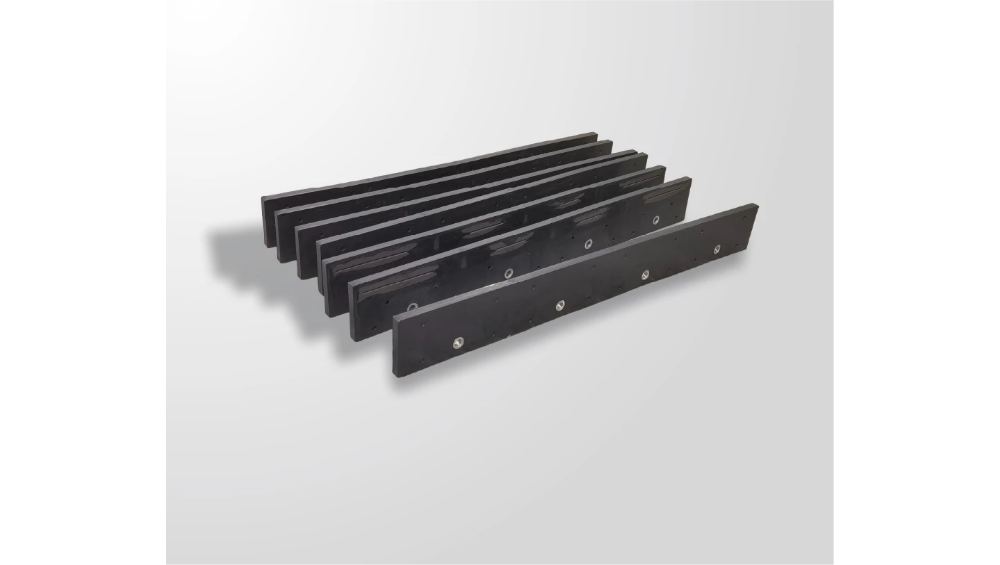
Most carbide blade failures do not start on the road; they start in the shop. A blade installed with mismatched holes, uneven clamping, or wrong torque will wear unevenly, loosen under load, and fail far earlier than the carbide should allow. The blade that “was fine yesterday” is often the blade that was never installed correctly.
This article is an installation guide for one-piece carbide snow plow blades: how to check holes against the mounting standard, the sequence that produces a consistent fit, the mistakes that shorten blade life, and how to verify the job before the first storm pass.
Most blade failures start at installation
Installation errors are hard to see and easy to deny. A hole that is a fraction of a millimeter off shifts the load to one side of the blade. A bolt torqued unevenly leaves the blade clamped hard in some spots and loose in others. None of this is visible from the cab, but all of it shows up in the wear pattern.
The cost is not just the blade. An improperly installed edge transfers stress into the moldboard and the mounting hardware, which means the repair bill can include parts that had nothing to do with the original purchase. Installation is therefore a quality step, and it deserves the same discipline as the manufacturing that produced the blade.
Before any work starts, confirm the blade matches the plow: same length, same thickness, same hole pattern, and compatible mounting hardware. If anything does not match, stop and resolve it with the drawing before forcing the blade into place.
Keeping a simple installation record helps the next changeout and the next order: date, truck, blade batch number, torque values used, and the condition of the old blade. That record turns installation from a routine job into usable data. When a blade wears unevenly or fails early, the record shows whether the installation was a suspect, and it gives the procurement file the field evidence a supplier conversation needs.
How do you check holes against AASHTO or DIN patterns?
The hole pattern is the interface between the blade and the plow, and it has to be checked, not assumed. SENTHAI states that its carbide snow plow blades are manufactured with bolt holes that comply with AASHTO (North America) or DIN (Europe) standards, with dimensional tolerances held to ±0.02 mm for the insert dimensions it publishes. The blade drawing and the plow drawing together define what “correct” means for your specific unit.
The practical check is a dry fit before bolting: lay the blade against the moldboard, confirm every hole lines up, and verify the countersink direction and hardware fit. Do not enlarge, re-drill, or modify holes in the field. If the pattern does not match, the correct action is to confirm the drawing with the manufacturer, not to make the blade fit with a drill.
A safe, repeatable installation sequence
Work on a level, stable surface with the plow supported and the vehicle secured, following the equipment manufacturer’s lockout and safety procedures. The sequence below is a framework; the specific torque values and order belong to the plow manufacturer’s manual and the order documents.
- Clean the moldboard mounting surface and inspect the hardware for wear or damage;
- Position the blade against the moldboard and insert all bolts by hand to confirm alignment before tightening anything;
- Tighten in a pattern that spreads the load evenly, typically from the center outward, so no side is clamped before the others;
- Apply the specified torque in stages, not in one pass, so the blade seats evenly;
- Re-check every fastener after the first few minutes of operation and again after the first route.
| Installation step | Action |
|---|---|
| 1 | Clean the moldboard mounting surface and inspect the hardware for wear or damage |
| 2 | Position the blade and insert all bolts by hand to confirm alignment before tightening |
| 3 | Tighten in a pattern that spreads the load evenly, typically from the center outward |
| 4 | Apply the specified torque in stages, not in one pass |
| 5 | Re-check every fastener after the first minutes of operation and again after the first route |
Before starting, gather the tools, the replacement hardware, and the torque specification so the job runs without improvisation. A prepared station is also a safer one: blades are heavy, and the work involves holding a large steel part against a moldboard while fasteners go in. Two-person handling, a hoist where available, and clear floor space are part of the procedure, not optional extras.
If the plow uses adapter plates or spacers, install them in the order defined by the equipment manual and check that they are not worn. Adapters that have been bent by a previous impact will distort the blade fit even when the fasteners are torqued correctly, and they are a common hidden cause of a blade that “never sits right.”
Expert view — SENTHAI engineering team: “A blade is a long, thin part, and it will not forgive uneven clamping. Tighten in stages, center to the ends, and re-torque after the first run. The extra ten minutes at installation save the whole season.”
What five installation mistakes shorten blade life?
These five errors account for most premature failures:
1. Wrong hole pattern. Installing a blade whose holes do not match the moldboard shifts load and stresses the bolts. Confirm the pattern before bolting.
2. Uneven torque. Tightening one end fully before the other distorts the blade and creates uneven wear. Use a staged, center-out sequence.
3. Reusing damaged hardware. Worn bolts, stripped threads, and fatigued fasteners fail under winter load. Replace hardware that shows wear.
4. Skipping the re-torque. Fasteners settle after the first operation. A missing re-check turns a good installation into a loose one by the second storm.
5. Field modification. Drilling, grinding, or bending a blade to fit destroys the corrosion protection and the dimensional accuracy. Resolve mismatches with the supplier instead.
These mistakes compound. A slightly mismatched hole pattern shifts load to one side, which increases wear on that side, which makes the next changeout harder to align, which tempts the crew to modify something. The chain starts with a preventable installation error and ends with a prematurely replaced moldboard. Catching the first link, the fit and the torque, is what breaks the chain.
Verifying the fit before first use
After installation, run a visual and physical check: every fastener present and torqued, the blade seated flush against the moldboard, no gaps at the ends, and the cutting edge aligned with the plow’s working angle. Then run the re-torque check after the first use, because that is when the parts settle into their working position.
A short verification on a controlled section of pavement is worth doing before the first storm. Listen for unusual vibration or chatter, and inspect the wear pattern after the first few passes. A blade that was installed correctly shows even contact; one that was not will announce itself in the wear.
The same discipline applies to receiving: when the blades arrive, check the batch numbers and dimensions against the order before they go to the shop. SENTHAI’s quality-control page describes the incoming review and final sampling stages that support product consistency, and a quick receiving check ties the delivered part to the documented specification before installation time is spent on it.
Get blades that drop in without rework
The best installation is the one that does not require field adjustment. That starts with a blade manufactured to a confirmed drawing: the right length, thickness, and hole pattern, so the dry fit passes the first time. SENTHAI’s carbide snow plow blade page describes AASHTO and DIN hole compliance and dimensional tolerances, and its engineering team confirms the specification before production.
When ordering, send the plow model, drawing, or current blade sample and request a drawing confirmation before production. That one step prevents most installation problems at the source. For the mounting questions specific to your plow, send the equipment details through the contact page and ask for the product-specific confirmation.
Frequently Asked Questions
How important is the bolt pattern for carbide blades? Critical. A mismatched pattern shifts load and stresses the hardware. SENTHAI states its blades comply with AASHTO or DIN hole standards; confirm the pattern against your plow drawing before installation.
What torque should I use for carbide blade bolts? Use the torque values from the plow manufacturer’s manual and the order documents. Do not rely on memory or a single-pass tightening; apply torque in stages and re-check after the first run.
Can I drill new holes in a carbide blade to make it fit? No. Field modification destroys dimensional accuracy and protection. If the pattern does not match, confirm the drawing with the manufacturer.
Why does my blade wear unevenly? Uneven wear often traces to uneven clamping or a mismatched hole pattern. Check torque, mounting condition, and the blade’s fit against the moldboard before blaming the carbide.
How soon should I re-torque after installation? After the first short operation and again after the first full route. Fasteners settle, and the re-check is what keeps the installation tight.
What should I send the supplier to avoid fit problems? The plow model, a drawing or current blade sample, and the hole-pattern information. A drawing confirmation before production prevents most installation issues.
Sources
Related articles
 Best Snow Plow Blade Family for Your Fleet: Top 5 ScenariosKnowledge
 Top 10 Snow Plow Blade Types for Winter Fleets (Ranked by Duty Fit)Knowledge
 Top 5 Best Carbide Blade Configurations for Highway PlowingKnowledgeBest Snow Plow Blade Materials Ranked: Steel vs Carbide vs Cladding vs Rubber-CarbideKnowledge