




Braze Quality Insert Retention: What the Joint Decides in Service
Braze quality insert retention in service: what a sound joint looks like, which failure modes signal a bonding fault, and what to record at each rotation.
An insert that leaves a blade in the middle of a storm cycle takes the scraping edge with it and turns a maintenance task into a road-call repair. Braze quality is the variable that most often decides whether that happens, and it is the one variable a fleet cannot assess from a specification sheet. The joint is made before the blade ships, so the evidence has to be built into production and then confirmed by inspection in service.
What Braze Quality Looks Like in the Field
A sound joint shows no movement along the bond line.
Braze quality reads in the field as inserts that stay seated under shock loading. A joint that is incomplete, contaminated or unevenly heated shows movement, gaps and irregular discolouration before an insert is lost.
Inspectors should be looking for four things: movement when the insert is loaded by hand, visible gaps or voids along the insert base, discolouration that differs across the joint, and carbide sitting proud of or below the surrounding surface. Each of those signals a different production variable rather than a different material, which matters because a grade change will not correct any of them.
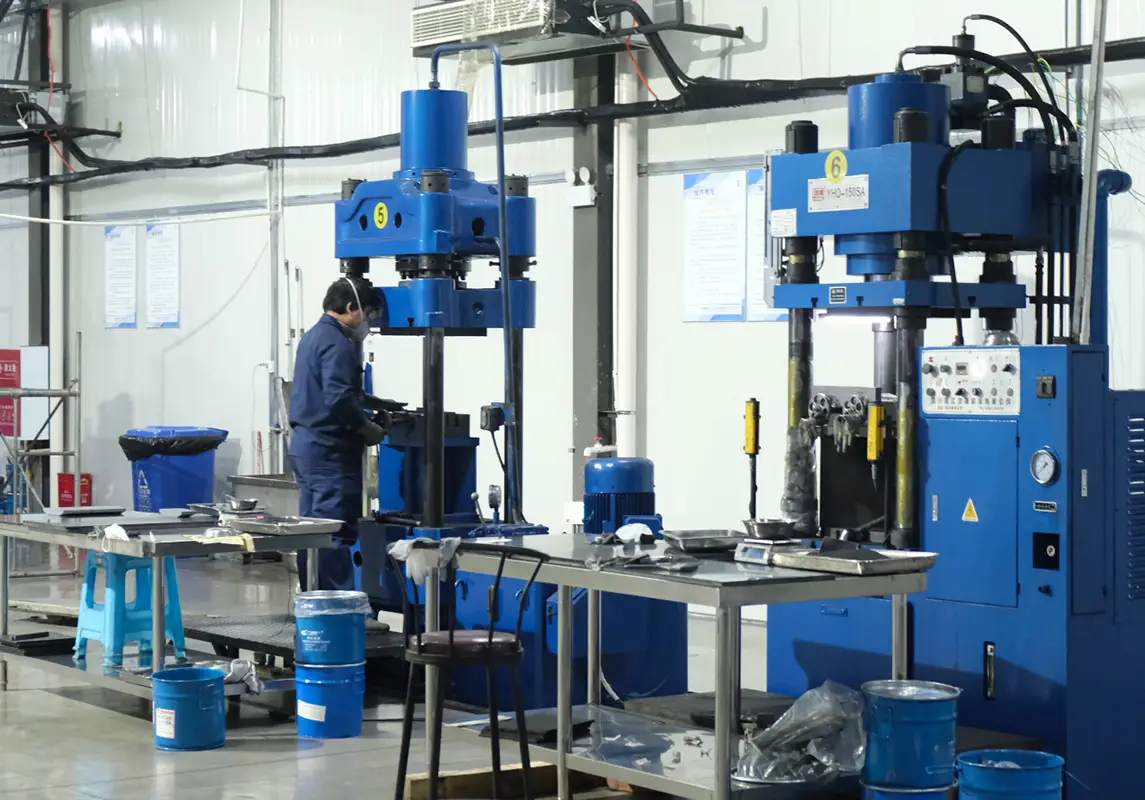
What a good joint does not look like is also worth stating. An even bond line with consistent filler distribution along the full insert base, no movement under hand load and no height variation across the edge is the expected appearance of a controlled process. SENTHAI brazes with automated high-temperature induction equipment in Rayong, Thailand, which gives repeatable heat input at each insert position; the process is described in operational terms on the brazing for plow edges page.
Braze Quality Insert Retention: Failure Modes and What They Signal
Every joint failure points back to a process variable. Inserts that loosen at the ends of a blade usually indicate uneven heating across the assembly, because the ends lose heat faster than the centre and cool at a different rate. Inserts that come loose in the middle of the working width more often indicate contamination or insufficient filler rather than a heat problem.
Voids and incomplete fill appear as gaps along the insert base and reduce the bond area that carries load. They typically come from inadequate joint cleanliness or from a clearance that is outside the range the filler metal can flow through. Carbide that sits proud of its neighbours after fitting points to a seating problem rather than a bonding one, and it will concentrate load on one edge of the insert until either the insert or the joint fails.
Discolouration deserves specific attention. Irregular colour across a joint indicates that different parts of the assembly reached different temperatures, which affects both the filler flow and the properties of the steel body around the joint. A uniform, consistent appearance along the bond line is evidence of controlled heat input; variation is evidence of the opposite. Technical background on how brazing works as a joining process is published by TWI, and filler metal selection is documented by Lucas Milhaupt.
The same mechanism viewed from the production side, and what process control does to prevent insert loss, is covered in the material on how braze quality prevents carbide insert loss.
Inspection Points to Record at Each Rotation
Recording the same points at every rotation is what turns an inspection into a trend. Photograph both ends of the blade, both sides of the centre section and any position where an insert has been replaced, then note the number of inserts loose or missing, their positions, and the measured wear at fixed reference points. A photograph taken at the same angle each time is more useful than a written description, because it captures discolouration and gap development that a checklist will not.
The record should also carry the conditions the blade ran in: road class, surface mix and whether the blade was used on a route with embedded obstacles. Without that context, a wear reading from a residential route and one from a highway route look comparable when they are not, and the joint analysis becomes guesswork.
Two measurements belong in every record. The first is insert height at fixed reference points across the working width, which shows whether loss is even or localised. The second is any change in gap or movement at the joint, checked by hand-loading a sample of inserts. Both take minutes, and together they distinguish a wear problem from a retention problem before the edge reaches the end of its interval.
Conditions That Accelerate Joint Degradation
Impact is the fastest route to joint failure. Embedded obstacles transfer shock through the insert into the bond line, and a joint with voids or incomplete fill concentrates that load on a fraction of the intended bond area. That is why the same blade specification behaves differently on two routes with similar abrasion but different debris exposure.
Corrosion works more slowly and is often overlooked. Where de-icing salts and abrasives are used heavily, the resulting slurry reaches exposed joint edges and steel surfaces, and repeated wetting and drying accelerates deterioration around the insert base. Regular cleaning and prompt attention to any joint that has opened are the practical responses, and the regulatory context for material use that many agencies plan against is set out in the EPA’s municipal stormwater guidance.
Thermal cycling completes the picture. A blade that runs through repeated freeze-thaw cycles expands and contracts with the surface it works, and a joint that was produced with uneven heat input carries residual stress that makes it less tolerant of that cycling. This is an argument for consistent production control rather than for a different filler metal, because the failure originates before the blade reaches the fleet.
Repair, Rotation or Replacement of a Damaged Joint
Repair is worth considering only where the failure is isolated and the surrounding bond is sound. A single insert with a small, localised gap can sometimes be documented and monitored to the end of the interval; a joint that has opened along a section of the blade should be treated as a structural issue rather than a cosmetic one. Field repair of brazed joints requires controlled heat, correct filler and clean surfaces, which is rarely available at the roadside.
Rotation is the more practical response where wear is uneven but the joints are sound. Moving an edge between trucks or between positions on the same blade spreads the abrasive load and delays the point at which one section determines the whole assembly’s life. This is only effective if the joint condition is recorded at each rotation, so that damage is attributed to a position rather than to the fleet as a whole.
Replacement is the correct decision where inserts have been lost, where a section of the bond has failed, or where wear has reached the point that the joint is exposed to the road surface. Continuing with a blade in that condition risks damage to the blade body, which costs more than the edge would have. SENTHAI maintains lot-level traceability and archives the inspection record for every batch, so a returned edge can be reviewed against the batch it came from rather than treated as an anonymous failure; the quality control and traceability page describes what those records contain.
Tools, Hardware and Safe Handling for Braze Quality and Insert Retention
Inspecting and handling brazed edges safely is a workshop discipline rather than a product feature. Edge assemblies are heavy, often sharp, and awkward to move without assistance, and the most common injuries during edge changes come from manual handling rather than from the tools used. The UK Health and Safety Executive publishes guidance on musculoskeletal disorders at work, and general workshop requirements for hand and power tool use are set out in the OSHA occupational safety and health standards.
The tools themselves are simple: a torch or light source for inspecting the bond line, a straight edge for checking insert height, hand protection for load testing, and a torque wrench where any mechanical fixing is involved. What matters is that the inspection kit is defined and available at the point of work, because an inspection that requires a trip to the stores will not be done in a busy week.
Welding and brazing operations, where a fleet carries out any repair in-house, add their own requirements for ventilation, fire precautions and operator competence, described in the guidance published by the American Welding Society. Metal property verification, where a fleet or an agency wants to check a supplied grade or filler against its specification, can be referenced to the test methods published by ASTM.

Season-End Storage and Preparation for Brazed Edges
How an edge is stored between seasons affects the joint as much as the carbide. Clean the blade and remove the abrasive slurry that has collected around the insert bases, because dried salts and grit hold moisture against the joint and accelerate corrosion over the storage period. Inspect each insert while the blade is accessible, and record any movement or gap before the blade is stacked.
Store edges flat and supported, off the ground, with room for air to move around them. Stacking blades directly on their cutting edges concentrates load on the inserts, and stacking on damp ground holds moisture against the joint line for months. A simple rack or timber dunnage costs little and removes both problems.
Oil or a corrosion inhibitor applied to the exposed joint edge and the steel body before storage helps where humidity is high, and a written note of condition at storage time makes the pre-season inspection a comparison rather than a fresh start. SENTHAI’s carbide insert range is documented so that joint and grade records travel with the assembly, which is the information a fleet needs to decide whether to reissue, rotate or retire an edge before the next season begins.
Braze quality decides retention, and retention decides whether an insert retires from wear or leaves the blade early. The joint is made in production, so the fleet’s control over it is exercised through specification, inspection and record keeping rather than through repair.
Three practices make that control real: inspect the same points and photograph them at every rotation, record joint condition alongside wear measurements and route conditions, and return edge data to the supplier in a form that can be traced to a batch. Done consistently, joint quality stops being an invisible variable and becomes a documented part of the maintenance plan.
Send SENTHAI photographs and positions of any inserts that have loosened or been lost, and the technical team will review the joint, the grade and the fitment against the batch record.
Frequently Asked Questions
What joint clearance is acceptable when brazing carbide to steel?
Brazing depends on capillary action drawing filler metal through the joint, so the gap must be small enough for that flow to occur and consistent across the insert base. Too wide a gap leaves voids; too tight a gap prevents filler from entering. The acceptable range follows from the filler metal and the assembly design, which is why clearance is controlled in production rather than set by eye during fitting.
Why does joint cleanliness matter so much?
Filler metal will not wet or flow across a contaminated surface. Oil, oxide, scale and handling residue all prevent proper bonding at the point where they sit, producing voids and reducing the effective bond area. Because the joint is hidden once assembled, contamination caught at production stage is the only reliable way to deal with it; no amount of inspection later can restore a bond that never formed.
Can a loose insert be re-brazed in the workshop?
It can be attempted where the surrounding bond is sound, but it requires controlled heat, the correct filler metal, thoroughly cleaned surfaces and a joint clearance within the specified range. Uneven heat input risks altering the properties of the surrounding steel and the adjacent joints. Where several inserts have moved or a section of the bond has failed, replacing the assembly is usually cheaper than repeated field repairs.
What is the most common brazing mistake in production?
Uneven and uncontrolled heat input is the most common, and it shows up as inconsistent bond quality across a single blade rather than as a uniform weakness. Inserts at the ends of an assembly lose heat faster than those in the centre, so a process that is not controlled position by position produces a blade whose weakest joints are the ones carrying the most load in service. Automated induction heating addresses this directly.
Related articles
 Carbide Grade Selection for Cold and Abrasive ConditionsCarbide Inserts
 Carbide Insert Retention: Brazing vs Mechanical FixingCarbide Inserts
 Trapezoid vs Bullnose Inserts: Which Geometry Fits the CutCarbide Inserts
 Micro Grain Carbide Inserts vs Standard Grain Grades: Choosing by Wear MechanismCarbide Inserts