




Choosing an Ice-Breaking Kit for Municipal Ice Routes
Every municipality has a handful of corridors where the same storm produces a different outcome: shaded sections that ice first, bridges that freeze before the surrounding road, and intersections where the pack builds to…
Every municipality has a handful of corridors where the same storm produces a different outcome: shaded sections that ice first, bridges that freeze before the surrounding road, and intersections where the pack builds to a crust that standard blades cannot break. Those are the ice routes, and they deserve a dedicated specification instead of the same edge the rest of the fleet runs.
This article is a selection method for municipal ice routes: how to grade corridors by ice severity, how to match a packed ice carbide kit to the route profile, how to run a pilot before a fleet-wide purchase, and how to budget the program so the investment is defensible.
Ice routes deserve a dedicated spec
A dedicated ice-breaking kit is not a luxury purchase; it is a response to a measurable difference in route performance. On an ice route, a standard scraping edge leaves the bonded crust behind, forcing extra passes and extra chemical. The same corridor with an edge that fractures the crust changes the operation: fewer passes, less chemical, and a service level the route actually needs.
The business case starts with the route data. If a corridor consistently requires more passes or more chemical than comparable routes, it is an ice route by definition, and the spec should change for that corridor. The mistake is to buy one edge for the whole fleet and accept that the worst corridors will underperform.
Route data also protects the program from the opposite error: buying ice kits everywhere because one corridor failed. The kit is justified corridor by corridor, and the grading step is what keeps the purchase honest. Without grading, a fleet risks spending on fracture-capable edges for streets that never build a crust, which is exactly the kind of purchase a budget committee will question.
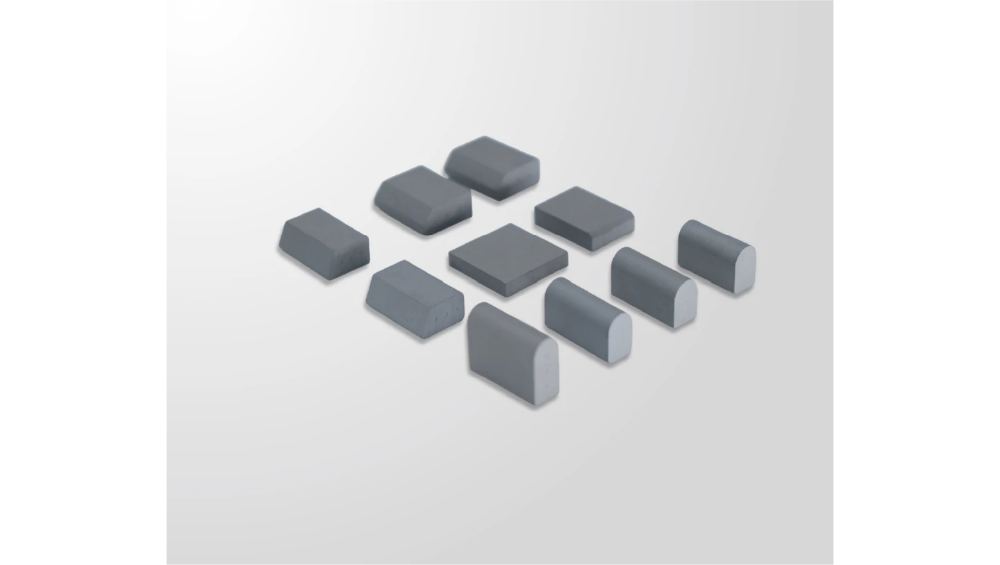
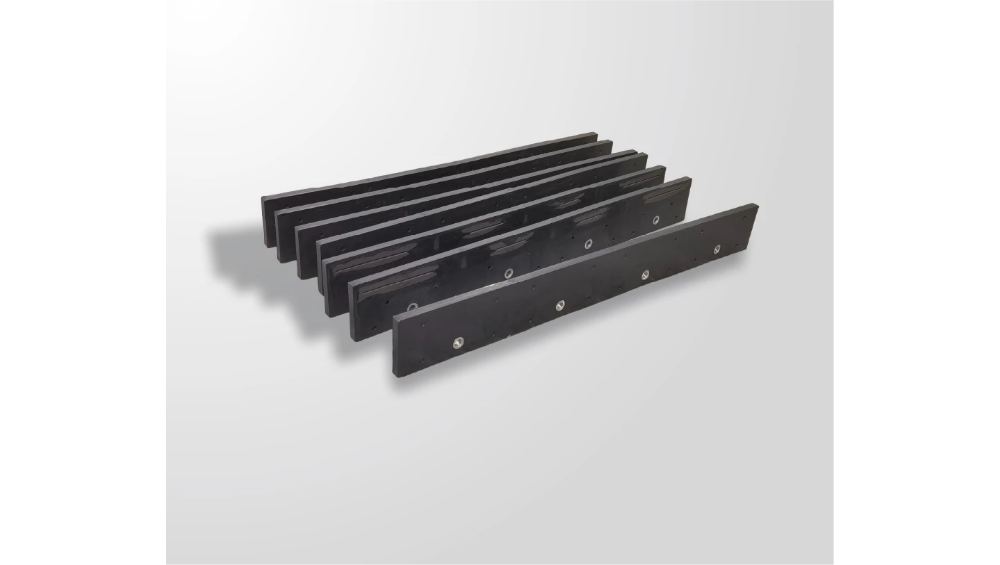
SENTHAI’s packed ice carbide kit is one example of the dedicated approach: a design with dome-head geometry to fracture thick ice and isolated inserts to prevent lateral cracking, built for the bonded-crust case. The product page describes the intended use; this article is about deciding where and how to deploy it.
How do you grade routes by ice severity?
Grading is the first step, and it does not need sensors or consultants. Use the knowledge already in the fleet:
- List every corridor that shows a consistent ice problem: shade, bridges, intersections, low spots;
- Record the treatment history: extra passes, extra chemical, repeated complaints;
- Rate each corridor by severity and by the frequency of the condition across the season.
A simple grading scale works:
| Grade | Ice profile | Typical treatment today | Kit priority |
|---|---|---|---|
| Low | Occasional frost or light pack | Normal scraping handles it | None |
| Medium | Regular pack on bridges and shade | Extra passes and chemical | Candidate |
| High | Bonded crust every storm | Repeated passes, high chemical use | Priority |
The high-grade corridors are the deployment targets. They are the routes where a fracture-capable edge changes the outcome, and they are the ones to measure in the pilot.
Selecting kits by route profile
Once the corridors are graded, match the kit to the profile. For high-severity routes where the crust is thick and bonded, the selection factors are:
- Section size and coverage: the kit must match the plow width and mounting system, with sections sized to the moldboard;
- Fracture geometry: dome-head inserts that focus downward pressure on the ice structure rather than skimming it;
- Structural durability: isolated insert design to resist lateral cracking under repeated high-speed impact;
- Compatibility: hole pattern and mounting verified against the plow, with the manufacturer’s drawing confirmation.
SENTHAI describes its packed ice kit with exactly these characteristics: dome-head geometry, isolated carbide inserts, and 4-foot heavy-duty sections built as solid units designed to be used until the carbide reaches its wear limit. For a municipal buyer, that description translates into a checklist: geometry for fracture, construction for durability, and fit confirmed by drawing.
For corridors that do not qualify as ice routes, the standard carbide snow plow blade remains the right tool, which is why the kit decision should never be a fleet-wide replacement. The specification question is per corridor: does the route profile show bonded crust that a scraping edge cannot break? Only the corridors that answer yes move to the kit evaluation.
How do you run a pilot before a fleet-wide buy?
A pilot on the worst corridor is the fastest way to prove or disprove the purchase. The design is straightforward:
- Choose one or two high-grade corridors and equip the assigned units with the ice-breaking kit;
- Keep the comparison routes on the current equipment and practices;
- Track the same storm responses on both sets: passes, chemical tons, plow time, edge condition;
- Compare service quality, not just chemical numbers, so the trial shows whether the corridor was cleared to standard;
- Review at a defined point mid-season and decide whether to scale.
Expert view — SENTHAI engineering team: “A municipal ice kit is easy to justify on the worst corridor and hard to justify fleet-wide without a trial. Put it on the route that fails every storm, measure passes and chemical use against a control section, and let the data decide the rollout.”
The pilot has a second benefit: it produces the numbers the budget request needs. A corridor that used fewer passes and less chemical with the kit is a measurable argument for the next season’s purchase.
Budgeting the ice program
The budget case for an ice-breaking kit is built on the corridor-level difference, not on a supplier brochure. Assemble the pilot data: passes per storm, chemical tons per corridor, plow hours, and edge condition. Convert the difference into the two numbers a committee understands: the reduction in operating cost per corridor and the payback on the kit investment.
Use a conservative estimate. If the pilot shows a meaningful difference, budget the rollout for the high-grade corridors first and leave the medium-grade routes for a second phase. If the pilot is inconclusive, the money stays in the reserve and the decision is deferred, which is a legitimate outcome of a well-designed trial.
As an illustration, if a high-grade corridor used three passes and a fixed chemical tonnage per storm with the standard edge, and the pilot kit cut it to two passes with less chemical on the same storms, the saving is the difference in plow hours and salt cost per event, multiplied by the number of events in a season. The arithmetic is deliberately simple; the point is that the numbers come from the pilot, not from a supplier’s range. Present the per-corridor saving and the kit cost side by side, and the payback statement writes itself.
The budget should also include the measurement cost: the labor to log passes, chemical use, and edge condition during the pilot. That cost is small, but it is real, and leaving it out makes the program look cheaper than it is and the data look easier than it was.
Plan the ice kit rollout
The rollout follows the grading: high-grade corridors first, medium-grade after the first season’s data, low-grade never unless conditions change. For each phase, confirm the kit configuration against the plows, order with the documentation requirements included, and keep the pilot measurement running so the program continues to justify itself.
To start, send the corridor list, grading notes, and plow information through the contact page and ask for the kit configuration and pilot terms for the high-grade routes. The route data you already have is the right first input; the kit follows the corridors that need it.
Frequently Asked Questions
How do I know which routes need an ice-breaking kit? Grade the corridors by ice severity: consistent bonded crust, extra passes, and high chemical use are the signals. High-grade corridors are the deployment targets.
What makes a kit right for municipal ice routes? Fracture geometry for the crust, durable construction for repeated impact, and a fit confirmed against the plow. SENTHAI’s packed ice kit uses dome-head geometry and isolated inserts for this duty.
Should I buy kits for the whole fleet at once? No. Start with a pilot on the worst corridor, measure the difference, and scale to high-grade corridors first. Fleet-wide conversion without route data is a gamble.
What should the pilot measure? Passes per storm, chemical tons, plow time, edge condition, and service quality, compared against a control section on the same storms.
How do I justify the budget? Convert the pilot difference into operating cost per corridor and payback on the kit investment. Present the conservative case to the committee.
Does the kit reduce chemical use? By design, mechanical ice breaking removes part of the bonded crust so less chemical is needed to finish the route. SENTHAI states the kit can allow a significant reduction, often up to 25–40%, but the number for your city comes from your trial.
How should I order the kits? Send the plow models, corridor list, and grading notes, and request a drawing-based configuration confirmation plus pilot terms in writing.
Sources
Related articles
 Best Snow Plow Blade Family for Your Fleet: Top 5 ScenariosKnowledge
 Top 10 Snow Plow Blade Types for Winter Fleets (Ranked by Duty Fit)Knowledge
 Top 5 Best Carbide Blade Configurations for Highway PlowingKnowledge
 Best Snow Plow Blade Materials Ranked: Steel vs Carbide vs Cladding vs Rubber-CarbideKnowledge