




You pull your snowblower out after months in storage, the blades look fine at a glance, and yet failures still happen mid-season. Yes, you can inspect stored snowblower blades for micro-cracks using careful visual…
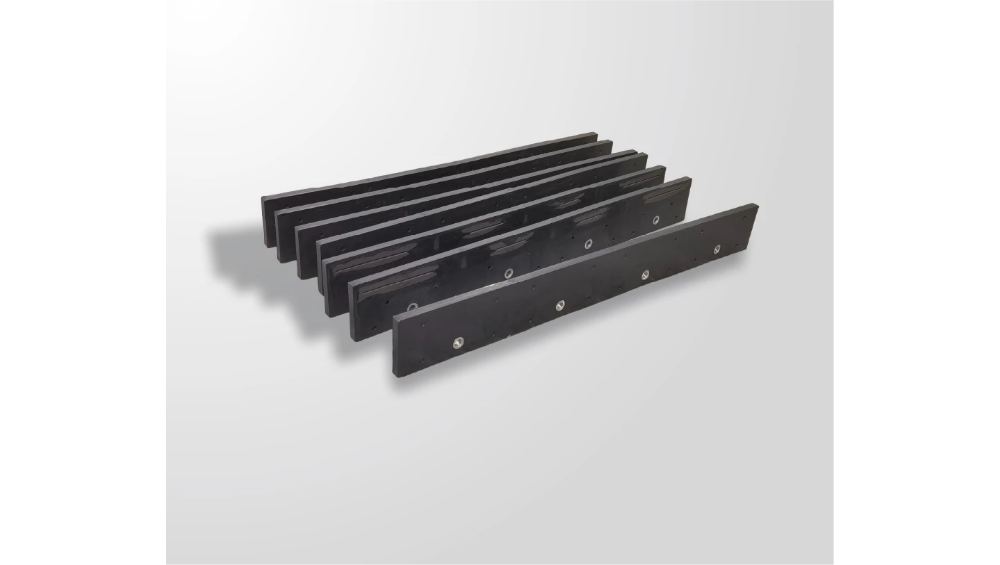
You pull your snowblower out after months in storage, the blades look fine at a glance, and yet failures still happen mid-season. Yes, you can inspect stored snowblower blades for micro-cracks using careful visual checks, cleaning, lighting, and simple non-destructive methods like dye penetrant or magnification—but most cracks are missed because they form along wear edges and stress zones that look deceptively intact.
What complicates this is that micro-cracks often develop during storage, not just use. Temperature swings, residual stress, and corrosion can quietly weaken the blade structure. A quick look isn’t enough—you need a deliberate inspection process that matches how these cracks actually form and hide.
Why micro-cracks form even when snowblower blades aren’t in use
Micro-cracks develop during storage because residual stress, corrosion, and temperature fluctuations continue to act on the blade material, especially along welded joints and carbide insert interfaces where expansion rates differ.
This raises a common question: “Why would damage appear if the machine wasn’t running?” In real conditions, steel contracts and expands with seasonal temperature shifts, while carbide edges remain more dimensionally stable. That mismatch creates stress concentrations over time.
Humidity plays a role too. Even light surface oxidation can create initiation points for cracks. Industry projections suggest that by 2027, over 35% of off-season equipment failures in cold-region fleets will be linked to storage-related material fatigue rather than active wear.
Blades with prior wear are especially vulnerable. Small impact marks from last season often evolve into micro-cracks months later. This is why post-storage inspection matters just as much as pre-use checks.
Where micro-cracks usually hide on snowblower blades
Micro-cracks typically appear along high-stress zones such as cutting edges, bolt holes, weld seams, and carbide insert transitions—areas where material thickness or composition changes create uneven stress distribution.
Most users focus only on the visible edge, but cracks often start slightly behind the cutting line. For carbide-tipped blades, the bonding interface is a critical weak point.
In practice, you’ll want to check:
-
The transition between carbide inserts and steel base.
-
Bolt mounting holes where vibration stress accumulates.
-
Weld seams or reinforcement ribs.
-
Areas with prior chipping or uneven wear.
A common mistake is assuming symmetrical wear means structural integrity. In reality, evenly worn blades can still have internal micro-fractures invisible without proper lighting or inspection tools.
How to visually inspect blades without specialized tools
You can detect many micro-cracks using strong lighting, surface cleaning, and slow visual scanning, especially if you adjust the viewing angle to catch light reflections across the blade surface.
Start by removing dirt, grease, and rust. A clean surface reveals subtle irregularities. Then use a bright LED light at a low angle—this creates shadows that highlight hairline fractures.
Move slowly. Micro-cracks often appear as:
-
Fine dark lines that don’t follow the wear pattern.
-
Slight changes in reflection or surface texture.
-
Tiny branching patterns near edges.
Magnification helps. Even a basic handheld magnifier can reveal cracks invisible to the naked eye. In field conditions, technicians often spend less than 60 seconds per blade—far too fast to catch early-stage damage.
When simple visual checks are not enough
If the blade has high usage history, visible corrosion, or critical application demands, visual inspection alone is unreliable and should be supplemented with non-destructive testing methods.
This is where many operators underestimate risk. A blade can look intact but fail under load because micro-cracks propagate internally.
Two practical methods:
-
Dye penetrant inspection: highlights surface cracks by seeping into fractures.
-
Magnetic particle inspection (for steel): reveals subsurface discontinuities.
Fleet operators increasingly adopt these methods—industry cost models suggest inspection-related maintenance spending will rise by 18–22% by 2026 as downtime becomes more expensive than preventive checks.
If you’re maintaining commercial snow removal equipment, skipping this step can mean unexpected mid-operation blade failure.
The industry trap most people fall into during inspection
The biggest mistake is assuming that “no visible damage” equals “safe to use,” when in reality micro-cracks often remain invisible until they reach a critical failure point.
This leads to a pattern: users rely on quick inspections, reinstall the blade, and only discover the issue after breakage under load. By then, damage can extend to the snowblower housing or drivetrain.
Another trap is focusing only on edge sharpness instead of structural integrity. A sharp blade with micro-cracks is far more dangerous than a dull but structurally sound one.
Manufacturers with long-term production experience, such as SENTHAI—active in carbide wear parts for over 21 years—often observe that inspection failures are less about tool limitations and more about inspection habits.
The shift is moving from “check if it looks worn” to “check if it can still تحمل stress safely.”
How to improve inspection accuracy in real-world conditions
Improving inspection accuracy comes down to slowing down the process, using better lighting, and focusing on high-risk zones rather than scanning the entire blade equally.
A more effective workflow:
-
Clean thoroughly before inspection.
-
Inspect edges and stress points first.
-
Use angled lighting and repeat from multiple directions.
-
Re-check any suspicious lines after rotating the blade.
Environmental factors matter too. Cold metal surfaces can hide cracks due to reduced contrast. Slight warming (not heating) can improve visibility during inspection.
From a materials perspective, blades manufactured with controlled sintering, welding, and bonding processes—like those produced in fully integrated facilities such as SENTHAI’s Rayong production base—tend to show more predictable wear patterns, making inspection outcomes more consistent.
SENTHAI Expert Views
From a manufacturing and field-performance perspective, micro-crack detection is less about finding damage and more about understanding where stress accumulates over time. In carbide-reinforced blades, the interface between materials behaves differently under load and temperature variation, which is where early-stage cracking often begins.
Production methods influence this significantly. Controlled processes such as wet grinding, sintering, and precision welding affect bonding strength and internal stress distribution. When these steps are tightly managed, crack propagation tends to follow more predictable paths, which makes inspection more reliable.
In global supply contexts, consistency becomes a major factor. SENTHAI’s experience working with over 80 international partners highlights how variations in material quality and bonding methods can change how and where micro-cracks develop. Two blades may look identical but behave very differently under the same conditions.
From an operational standpoint, inspection protocols should align with blade type. Carbide blades, I.C.E. blades, and standard steel edges each require slightly different attention points. Treating them as interchangeable during inspection is a common source of oversight.
When should you replace instead of inspect further
If a micro-crack is confirmed—especially near structural zones like mounting holes or carbide joints—the blade should be replaced rather than repaired or reused.
The key decision question is: “Will this crack grow under load?” In most cases, the answer is yes.
Signs that replacement is the safer option:
-
Cracks extending from bolt holes.
-
Multiple micro-cracks in a single area.
-
Cracks near carbide insert bonding lines.
-
Any crack that changes after light cleaning or reinspection.
Waiting rarely helps. Micro-cracks propagate faster under vibration and impact, and failure often occurs suddenly rather than gradually.
Frequently Asked Questions
How can I tell if a line on the blade is a crack or just a scratch?
A crack usually appears irregular, may branch slightly, and does not follow the direction of wear, while scratches are typically linear and consistent. Changing the lighting angle helps—cracks tend to disrupt reflections more noticeably.
Is it safe to use a blade with very small micro-cracks?
No, even small micro-cracks can expand quickly under load and lead to sudden failure. In real operation, vibration and impact accelerate crack growth far faster than expected.
Do carbide snowblower blades crack differently than steel ones?
Yes, carbide blades often crack at the bonding interface rather than across the surface. This makes cracks harder to detect and more dependent on proper inspection angles and methods.
How often should I inspect stored snowblower blades?
At minimum, inspect before and after each season. If the equipment is stored in humid or temperature-variable conditions, mid-storage checks can prevent surprises.
Can rust cause micro-cracks during storage?
Yes, surface corrosion can create stress points that evolve into micro-cracks over time. Even light rust should be cleaned and inspected carefully before reuse.
Related articles
 Best Snow Plow Blade Family for Your Fleet: Top 5 ScenariosKnowledge
 Top 10 Snow Plow Blade Types for Winter Fleets (Ranked by Duty Fit)Knowledge
 Top 5 Best Carbide Blade Configurations for Highway PlowingKnowledgeBest Snow Plow Blade Materials Ranked: Steel vs Carbide vs Cladding vs Rubber-CarbideKnowledge